Friday, February 26, 2010

I mentioned at the beginning of this week that I just had to try this tutorial and make a tent for my youngster's impending 2ND birthday. I have, and she absolutely adores it as do her siblings. I have a couple of suggestions. Use thicker/heavier thrifted sheets and tack the sheets at the bottom somehow. As soon as I find a good way I will let you know but I am thinking of closing off the channel for the pole at the bottom so they don't slide out.

I used the $4 sheets that I found at my local Walmart. Unfortunately they were microfiber and such a pain to sew with, not to mention they run and pulled like crazy. I will be making another with a thrifted sheet that is thicker and hopefully stiffer, or a light weight denim. I used wooden dowels and they work well, I do however have to get DH to drill the holes but a ribbon is doing an admirable job of holding the poles together. All in all a fun easy project. I completed it in one morning with a minimum of fuss. Definitely give it a try. :)


And this was the lovely winter weather that was going on. Thought that tree was going to come down it was so windy.


If you make this project stop by and leave me a link. I would love to see your versions!


Monday, February 22, 2010

Wanted to share my new living room curtains too. I bought these on clearance at Walmart, but they weren't quite long enough. I took out the seams that were for the rod (you can still see then, I haven't ironed yet), took scrap silk and made tabs, sewed it all together and Voila! Now they are perfect. Ignore the ugly trim and paint, we are waiting until spring then going to paint everything a sage color :D


Skirt Tutorial time!!

Alright, I can now upload pictures!!! Here it is, if you have any questions leave a comment with your email addy and I will help. This is for a reversible skirt but I will post where you can skip if you want a single layer.

First I always draw what I am hoping to achieve and figure out the math. I was a bit off on this so it's not a true circle skirt. I need a giant protractor. LOL. I made each panel 3.5 widening to 5.5 (includes 1/4 inch for seams) and 12.5 inches long. and the waist 40 x 2.5 again including the 1/4 inch seam allowance. Click pictures for larger.

Make a template. I use white tissue for this or fliers if I have them around. Cut out 13 panels, more if you want a fuller skirt.

Sew each panel together right side facing right

Until it looks like this
then iron iron iron.
See how much nicer it looks?
I like either finishing the seams with a zigzag or a straight stitch like this. Gives it a nice french seam look, although it isn't a true one.

Now if you are making a single layer skip down to adding the waist band.
if you want reversible do all of the above steps with the lining fabric until you have this...
Then pin the 2 skirts together right sides facing
Sew them together using a 1/4 inch turn right side out.
iron
top stitch
If you are doing a single layer turn up your hem and stitch too. :)
Now for the waist. Take your strip of 40 X 2.5 and sew the short ends together so you have a tube.

In one side to the top of your skirt. At this point you can make adjustments to make sure the tube is the same length as around the top of the skirt. I often have to shorten by 1/2 an inch for miscalculations. LOL
Sew all 3 layers together, go back over with a zigzag.
This is how it will look when you are done
To finish it and make a channel for the elastic fold it 1.4 in
then again so it lines up with the row of straight stitches you did.
Pin pin pin
Sew all the way around leaving an inch or so to feed an elastic through. Sew the elastic together and then close the seam.

Then Twirl!!


Please leave a comment telling me what you thought :)

Julia

Friday, February 12, 2010

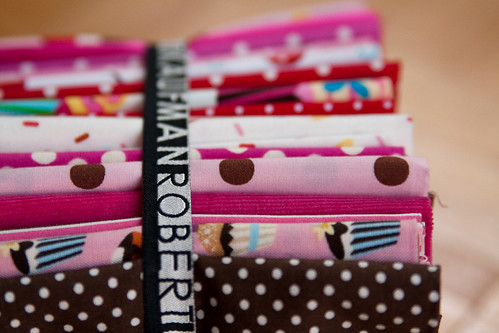
At the end of last week I was lucky enough to win a fat quarter bundle from Robert Kaufman on twitter. I was thrilled and excited, b/c it was a fabulous girly bundle perfect for my girl filled house!!

IMG_5806

I couldn't wait to cut into all this yummy pink goodness and decided that my youngest was going to get a new skirt. The older ones will get one too, but I like starting small. LOL.
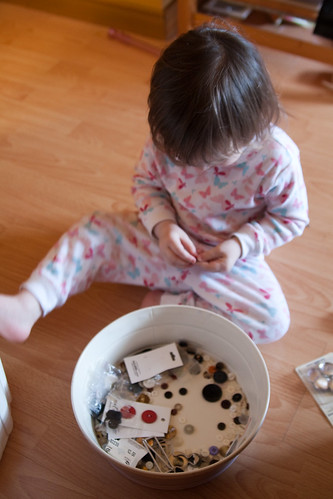
This is how she likes keeping busy. She is really good and never puts them in her mouth but she likes taking out the colorful ones and lining them up.

IMG_5819
IMG_5817

She loves her new skirt and hardly stood still long enough for me to snap these pictures. She is wearing a petti skirt under it in in the first picture.

IMG_5851

IMG_5858

The skirt turned out great and is reversible if I want it to be. I love it!

Friday, February 05, 2010

YAY!!!! My small SlingRings came in on Thursday and I couldn't wait to finish up the Melrose Blossom bag I had mostly finished. Look for more of these bags in my Etsy shop in the coming months. Here is the finished bag :)


For those that are interested the original bag made of Pod posies fabric is now for sale for $50 + shipping. It has some minor sewing flaws that are only cosmetic. If you want one of these bags I am accepting orders too. Just drop me an email at nugglemama . hotmail . com (no spaces) The bags will retail for $68 USD Happy Friday.

Monday, February 01, 2010

Blog Sponsors

If anyone is interested in sponsoring my sewing blog please drop me a line at nugglemama {dot} hotmail {dot} com I would love to have the opportunity to feature fabrics and patterns and post lots of pictures of course. Thank you!

Julia