Tuesday, September 14, 2010

Well I didn't win the Husquavarna Serger. Guess I have to go back to saving up for one. Maybe by the time the girls are getting married I'll have one. LOL.

The last couple of days I have been busy sewing up a Laptop sleeve and a bag to carry my new laptop in. It's been on my mind for a month or more but I couldn't get to it. Finally on Saturday night I sketched out what I wanted and then Sunday took some time to sew. I had so much trouble figuring out how to do a sleeve. I was going about it my usual way of winging it and it just didn't work. I ended up with a lovely reversible piece of fabric that zipped up but was open on both sides. Not quite what I was going for, Then I wan going to have it just be a center pocket, but it was WAY too big.

The seam ripper was my best friend.

Finally I set everything aside since I was getting frustrated and decided to tackle it again Monday.

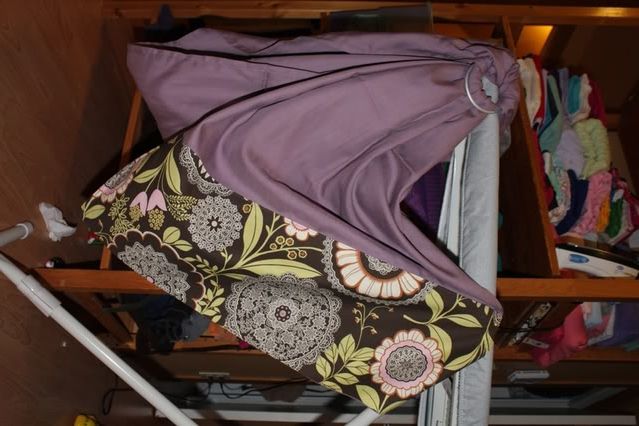
First thing I did was track down a tutorial on how to make a zippered laptop sleeve. With that done it actually went really quick and I was done in no time. Thanks for a fab tutorial!

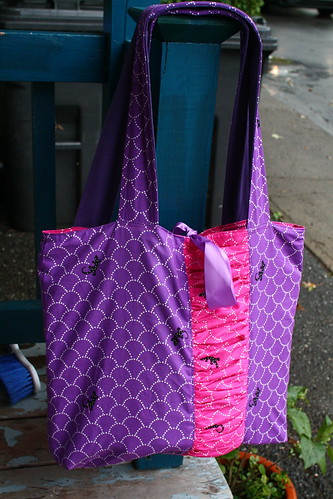
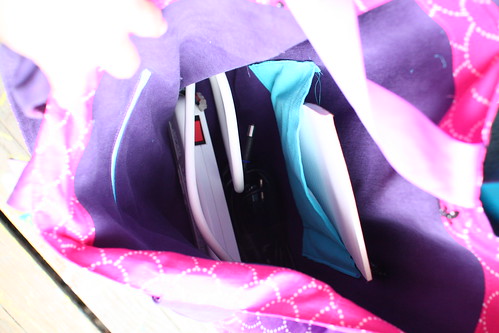
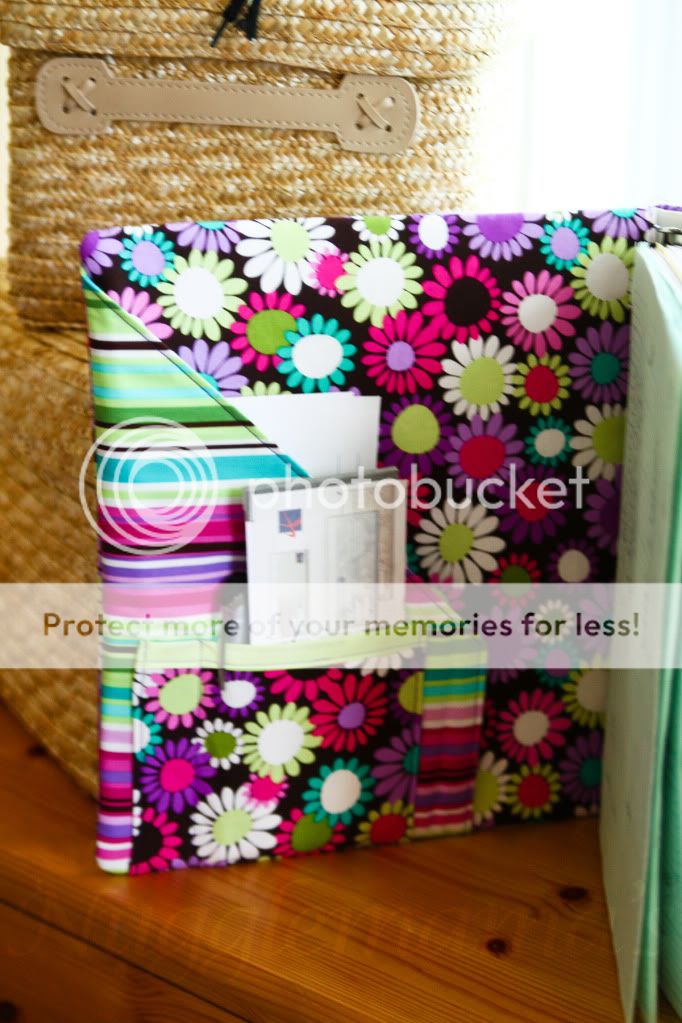
Next I had to shrink the tote bag down a bit and assemble it.  Totes are no problem for me thank goodness so it went fast as well. I will have to go back and add some fusible fleece and a strip of denim to secure the straps too. Right now the bag isn't as sturdy as I like. It works though since I don't actually GO anywhere with it LOL It is just a place to put my computer so the kids don't get into it.

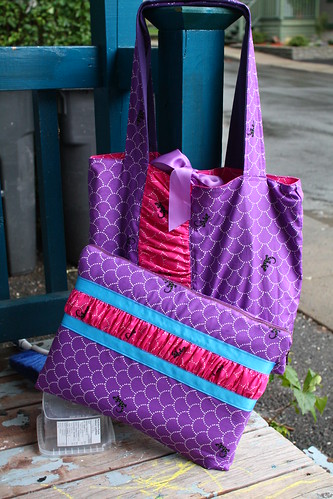
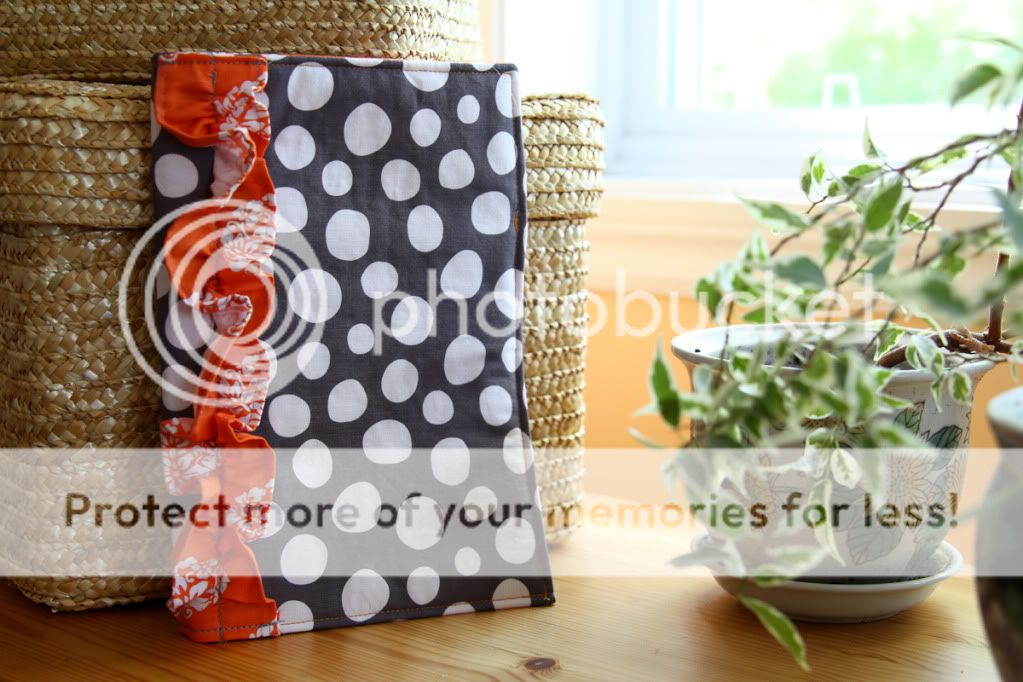
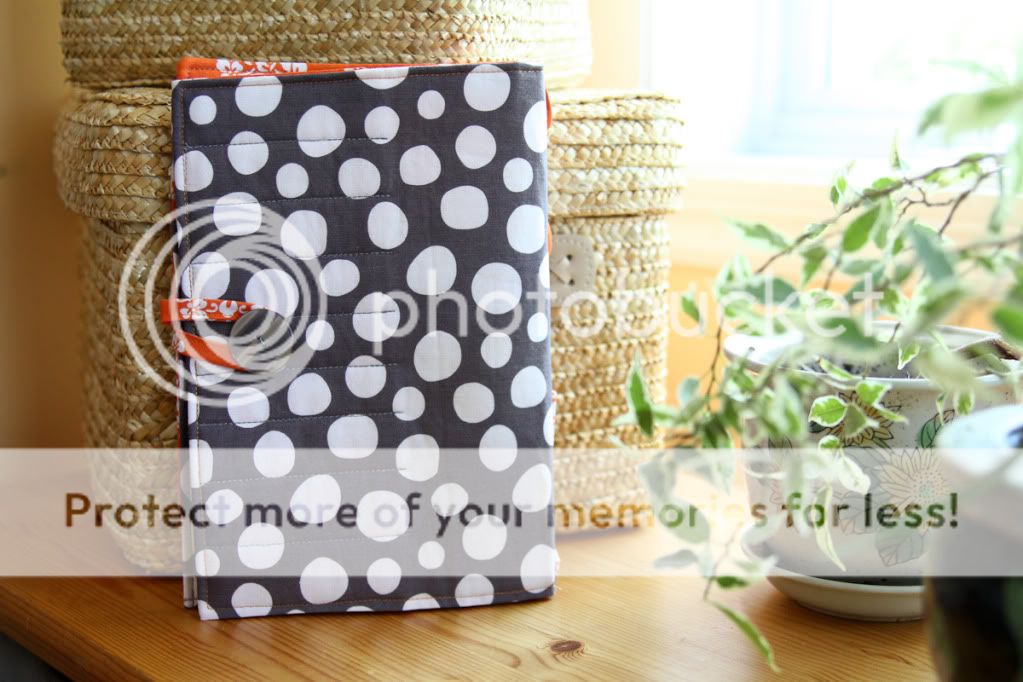
If you have made it all this way through my rambling here are the pictures of the final product. I love it!!!

Laptop bag

Inside pockets one zipper one not

Bag with laptop sleeve.

Monday, August 09, 2010

Why I should win the Husqvarna Viking s21 Serger from Sew Mama Sew.

They asked this question ~ How would your life be better with a serger? Here are my answers.

If I won my kids would do this, because I could sew all 5 of them snappy new duds. Happy kids = Happy Mama

Jumping for joy!

If it lived in my sewing area then my DH would stop giving me this look every time I asked him to buy me one.


I would be able to stop doing this every time I thought of sewing a curved hem.


I could stop posting tweets like this...


And could instead could post tweets like this..


Not sure if it would make my life easier because I would get more requests for stuff like this...


And this...


But it sure would be a heck of a lot more fun and fast.

Please choose this time crunched mom to 5 great kids to win this beautiful machine. I love re purposing old clothes and making handmade gifts for the holidays. I have been wanting a new serger for years but somehow, as is always the case, just when I have close to enough saved the car needs repairs or the kids blow up the toilet. (yeah don't ask LOL). This Nugglemama NEEDS a serger. I promise to be a good mommy to it and take it in for repairs and regular tune ups. I plan to baby it and use it often and pass on my love of sewing to my kids, even my son! Thanks so much for running such a great giveaway!

Julia,
Multi tasking mama to many little toes!

Saturday, June 26, 2010

I have been a bad crafty blogger as of late. My regular blog and the kids have been eating ALL my time. I keep meaning to sew up things but never find the time. I really want to make myself some summer slippers, because I hate bare feet and flip flops aren't the answer. So no sewing from me today. If you know of any fantastic tutorials that would get me wanting to put everything down and sew link me up baby!

Sunday, June 20, 2010

Please if you have a minute vote for me http://bit.ly/adCZJj If I win I will throw a giveaway for a $25 gift card to Starbucks! Have a wonderful Father's Day and Sunday!

Tuesday, June 08, 2010

A stop by post from me today. You must check out this blog. Seriously.

Sunday, May 30, 2010

Today's project shares a trial run on a crayon clutch and my new Emmaline Apron.

The crayon clutch didn't work quite how I wanted so take 2 in in progress. I do however love the ruffle, DD is pleased and that's all that really matters. :) The fabric is from Paula Prass Woodland Delight. Oh and the clutch is left handed functionally since DD is a lefty.
Front
Back
Inside

And my new Apron. I love love love it. It makes me happy just looking at it. I ordered it from a coop along with some fabric ages ago and have been anxiously awaiting it. The fabric I used on this is Flora and Fauna by Patty Young. This apron makes me feel sexy!


Friday, May 28, 2010

Yesterday I got a new toy! A Sony 5" Reader! I love it! As is evidenced by the copious use of exclamation points. LOL. Of course with any now toy comes the need to find an attractive way to protect. I used all my birthday money on the reader so buying a fancy cover with a light was out. I love fabric though and have more then enough so I thought, why not? I can make my own.

Here is the result. It's a prototype I made using some of my new Momo Freebird layer cakes pieces. They were maybe a half inch to narrow on one side with 1/4 inch seams so next time I will cut to measure. I just had to make something with that particular fabric though LOL.


I think next time I will make the whole thing 1.4 inch wider all around and maybe just do the corners on all sides. This does hold the reader very secure though so we'll see. I will also embellish with some ruffles and maybe a yo-yo or 2. I just wanted to get my new baby protected. :)

What do you think?

Monday, May 17, 2010

I promised more pictures of the dress, here you go. This will be the dress we do her yearly portraits in so I am sure you will be sick of it. It is made from the Miley epattern. This is a great beginners pattern. All the directions were easy to follow and having the pictures was a huge help for someone who needs to see each step like I do. I did have a bit of trouble figuring out what one step was trying to say about sewing the gussets to the side/front/back but it's intuitive anyhow and after getting DH to read it over and tell me what he thought it meant it made sense. It would have been nice to have a number picture for that step. All in all I would say maybe 4-5 hours of sewing time. The ruffles took the longest and the applique. I am not sure I love the pocket but Miss G adores it so I think all in all it's a win. I will have to get her to wear wear her petti for the next bunch of pictures to get the full effect of how awesome this dress is. As for the ruffles, they were a pain, but boy do I love how they look. So they were worth it!

Here is the pattern pieces most of them. I printed it onto regular paper and because I was using the biggest size just used that. For the one piece that I couldn't just cut and use because of how the lines flowed for the other sizes I traced it onto tissue first.


And some ruffle candy... I just  love how they look.


The front of the dress


Side view


See pretty


Think she likes it?

Sunday, May 16, 2010


Here is a sneak peak of the dress I have been making Miss G for her 9Th birthday. I promise more pictures tomorrow.

Don't forget to stop by my regular blog tomorrow to enter my Sew Mama Sew Giveaway Day post.

Thursday, May 13, 2010

As promised here is today's post with my first review of the One Yard Wonder book. I am not receiving any compensation I just thought it would be fun to add one more thing to my plate and do a pattern a week and show you all. It's also going to help me get my stash to a manageable level I hope LOL.

Today's pattern out of the book is the School Binder Cover. This took me (not including hand embroidery) about and hour and a half from making pattern pieces to finished. It's a great starter project for a beginner. No difficult piecing straight forward instructions.

The only thing I would do different is I would change the seam allowance.
  • Either add 1/4 inch ~ total seam allowance would be 3/4 of an inch.
  • Make seam allowance 1/2 but only stitch 1/4 inch seam
This way I would have had that extra 1/4 ease to topstitch the cover and give it a more finished look. Right now it's a perfect fit with no room to add it.

Here are the pictures of my finished project. I probably added 2 hours to the project because of the hand appliqueing the letters with a mix of embroidery stitches. I am not proficient at it and I have arthritis so it was slow going.


Wednesday, May 12, 2010

A funny sketch from Regretsy. I will add a disclaimer... The f word in mentioned once or twice but the graphic is funny enough to skip over that part.

Sewing machine parts

I need to get myself that on a mug or wall hanging or something. I love it! Stay tuned I hope to have a post for you tomorrow launching my year long weekly post about something I made out of the book One-Yard Wonders: 101 Sewing Projects. I am starting with a binder cover.

Saturday, April 10, 2010

Today was my favorite kind of day, I spent all afternoon and the better part of the evening working on sewing projects that I needed to catch up on. First up were Lizard beds and hair clips. Both for a birthday party my oldest attended this afternoon.


Then I drooled over the Robert Kaufman Cuddle I got in this week...


Then I sewed the ring sling for the winner of my 100 followers giveaway. It even has a pocket for keys or a diaper.


Last up a curtain for my bathroom made from more, you guessed it, Robert Kaufman fabric. This one is Sophia Lawn I believe and no longer available. I was saving it for a skirt but this way I will get to admire it everyday. I may add a wood dowel at the bottom so it hangs better when it's up.


There you have it. That is a days worth of sewing from me. :) Have a great night.

Tuesday, March 30, 2010

I need to avert my eyes from cute fabric sites. I am in Love with Amy Butler's new Love fabric. Just gorgeous. I don't need more fabric. I don't need more fabric. I don't need more fabric...
Today and yesterday I have been working on catching up my mending and designing and sewing up and Easter basket for one of my kids. 1 down 4 more to go LOL. I had so much fun whipping this up. Over the New year I won a blog giveaway from Paula Prass of her gorgeous Woodland Delight fabric. It is so nice and cheery and perfect for spring! Thank you Paula.

OK now onto the pictures. Here is the finished basket. I will try and write up a tutorial at some point in the future. It's an easy project and only took 2-3 hours with cutting, pinning, Ironing and sewing. Oh and speaking of Irons, I won one from Sleepytime Sewing this month while I was in hospital! Couldn't come at a better time since my iron is on it's last legs. It's also time for my machine to take a trip to the sewing machine doctors. I broke a needle the other day and now the stitches aren't as nice and straight as they used to be.

OK I'll shut up already. LOL Pictures... I am going to do large ones for the front entry to store all the hats ect.


Oh and as if I didn't have more then enough projects I came across this tutorial by one of my favorite people and now have to make one of these too.

Friday, February 26, 2010

I mentioned at the beginning of this week that I just had to try this tutorial and make a tent for my youngster's impending 2ND birthday. I have, and she absolutely adores it as do her siblings. I have a couple of suggestions. Use thicker/heavier thrifted sheets and tack the sheets at the bottom somehow. As soon as I find a good way I will let you know but I am thinking of closing off the channel for the pole at the bottom so they don't slide out.

I used the $4 sheets that I found at my local Walmart. Unfortunately they were microfiber and such a pain to sew with, not to mention they run and pulled like crazy. I will be making another with a thrifted sheet that is thicker and hopefully stiffer, or a light weight denim. I used wooden dowels and they work well, I do however have to get DH to drill the holes but a ribbon is doing an admirable job of holding the poles together. All in all a fun easy project. I completed it in one morning with a minimum of fuss. Definitely give it a try. :)


And this was the lovely winter weather that was going on. Thought that tree was going to come down it was so windy.


If you make this project stop by and leave me a link. I would love to see your versions!


Monday, February 22, 2010

Wanted to share my new living room curtains too. I bought these on clearance at Walmart, but they weren't quite long enough. I took out the seams that were for the rod (you can still see then, I haven't ironed yet), took scrap silk and made tabs, sewed it all together and Voila! Now they are perfect. Ignore the ugly trim and paint, we are waiting until spring then going to paint everything a sage color :D


Skirt Tutorial time!!

Alright, I can now upload pictures!!! Here it is, if you have any questions leave a comment with your email addy and I will help. This is for a reversible skirt but I will post where you can skip if you want a single layer.

First I always draw what I am hoping to achieve and figure out the math. I was a bit off on this so it's not a true circle skirt. I need a giant protractor. LOL. I made each panel 3.5 widening to 5.5 (includes 1/4 inch for seams) and 12.5 inches long. and the waist 40 x 2.5 again including the 1/4 inch seam allowance. Click pictures for larger.

Make a template. I use white tissue for this or fliers if I have them around. Cut out 13 panels, more if you want a fuller skirt.

Sew each panel together right side facing right

Until it looks like this
then iron iron iron.
See how much nicer it looks?
I like either finishing the seams with a zigzag or a straight stitch like this. Gives it a nice french seam look, although it isn't a true one.

Now if you are making a single layer skip down to adding the waist band.
if you want reversible do all of the above steps with the lining fabric until you have this...
Then pin the 2 skirts together right sides facing
Sew them together using a 1/4 inch turn right side out.
iron
top stitch
If you are doing a single layer turn up your hem and stitch too. :)
Now for the waist. Take your strip of 40 X 2.5 and sew the short ends together so you have a tube.

In one side to the top of your skirt. At this point you can make adjustments to make sure the tube is the same length as around the top of the skirt. I often have to shorten by 1/2 an inch for miscalculations. LOL
Sew all 3 layers together, go back over with a zigzag.
This is how it will look when you are done
To finish it and make a channel for the elastic fold it 1.4 in
then again so it lines up with the row of straight stitches you did.
Pin pin pin
Sew all the way around leaving an inch or so to feed an elastic through. Sew the elastic together and then close the seam.

Then Twirl!!


Please leave a comment telling me what you thought :)

Julia