Sunday, May 30, 2010

Today's project shares a trial run on a crayon clutch and my new Emmaline Apron.

The crayon clutch didn't work quite how I wanted so take 2 in in progress. I do however love the ruffle, DD is pleased and that's all that really matters. :) The fabric is from Paula Prass Woodland Delight. Oh and the clutch is left handed functionally since DD is a lefty.
Front
Back
Inside

And my new Apron. I love love love it. It makes me happy just looking at it. I ordered it from a coop along with some fabric ages ago and have been anxiously awaiting it. The fabric I used on this is Flora and Fauna by Patty Young. This apron makes me feel sexy!


Friday, May 28, 2010

Yesterday I got a new toy! A Sony 5" Reader! I love it! As is evidenced by the copious use of exclamation points. LOL. Of course with any now toy comes the need to find an attractive way to protect. I used all my birthday money on the reader so buying a fancy cover with a light was out. I love fabric though and have more then enough so I thought, why not? I can make my own.

Here is the result. It's a prototype I made using some of my new Momo Freebird layer cakes pieces. They were maybe a half inch to narrow on one side with 1/4 inch seams so next time I will cut to measure. I just had to make something with that particular fabric though LOL.


I think next time I will make the whole thing 1.4 inch wider all around and maybe just do the corners on all sides. This does hold the reader very secure though so we'll see. I will also embellish with some ruffles and maybe a yo-yo or 2. I just wanted to get my new baby protected. :)

What do you think?

Monday, May 17, 2010

I promised more pictures of the dress, here you go. This will be the dress we do her yearly portraits in so I am sure you will be sick of it. It is made from the Miley epattern. This is a great beginners pattern. All the directions were easy to follow and having the pictures was a huge help for someone who needs to see each step like I do. I did have a bit of trouble figuring out what one step was trying to say about sewing the gussets to the side/front/back but it's intuitive anyhow and after getting DH to read it over and tell me what he thought it meant it made sense. It would have been nice to have a number picture for that step. All in all I would say maybe 4-5 hours of sewing time. The ruffles took the longest and the applique. I am not sure I love the pocket but Miss G adores it so I think all in all it's a win. I will have to get her to wear wear her petti for the next bunch of pictures to get the full effect of how awesome this dress is. As for the ruffles, they were a pain, but boy do I love how they look. So they were worth it!

Here is the pattern pieces most of them. I printed it onto regular paper and because I was using the biggest size just used that. For the one piece that I couldn't just cut and use because of how the lines flowed for the other sizes I traced it onto tissue first.


And some ruffle candy... I just  love how they look.


The front of the dress


Side view


See pretty


Think she likes it?

Sunday, May 16, 2010


Here is a sneak peak of the dress I have been making Miss G for her 9Th birthday. I promise more pictures tomorrow.

Don't forget to stop by my regular blog tomorrow to enter my Sew Mama Sew Giveaway Day post.

Thursday, May 13, 2010

As promised here is today's post with my first review of the One Yard Wonder book. I am not receiving any compensation I just thought it would be fun to add one more thing to my plate and do a pattern a week and show you all. It's also going to help me get my stash to a manageable level I hope LOL.

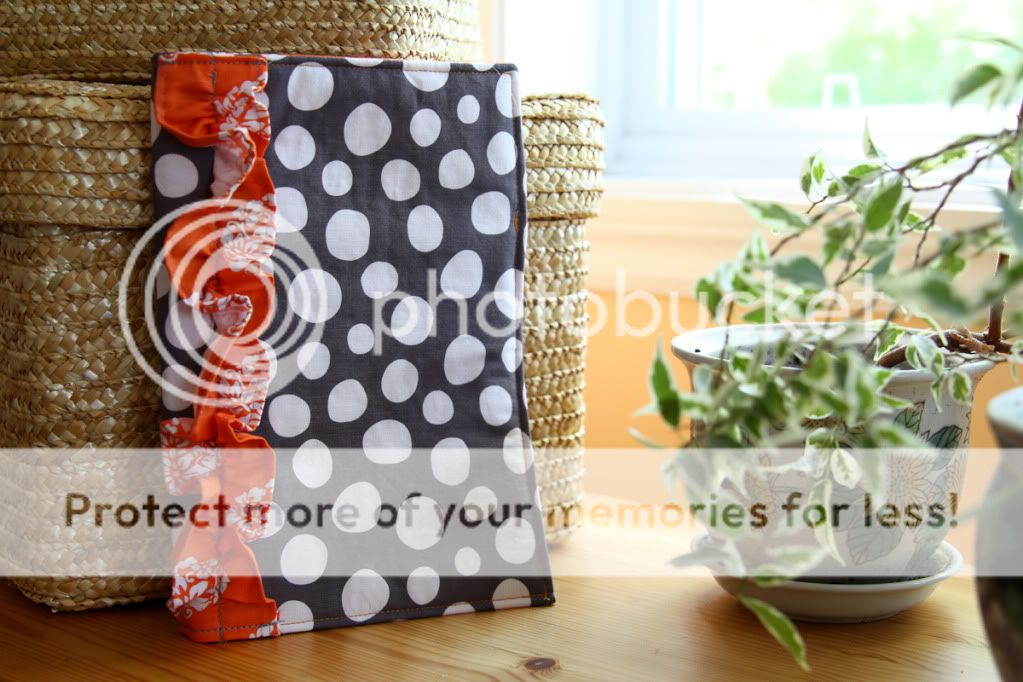
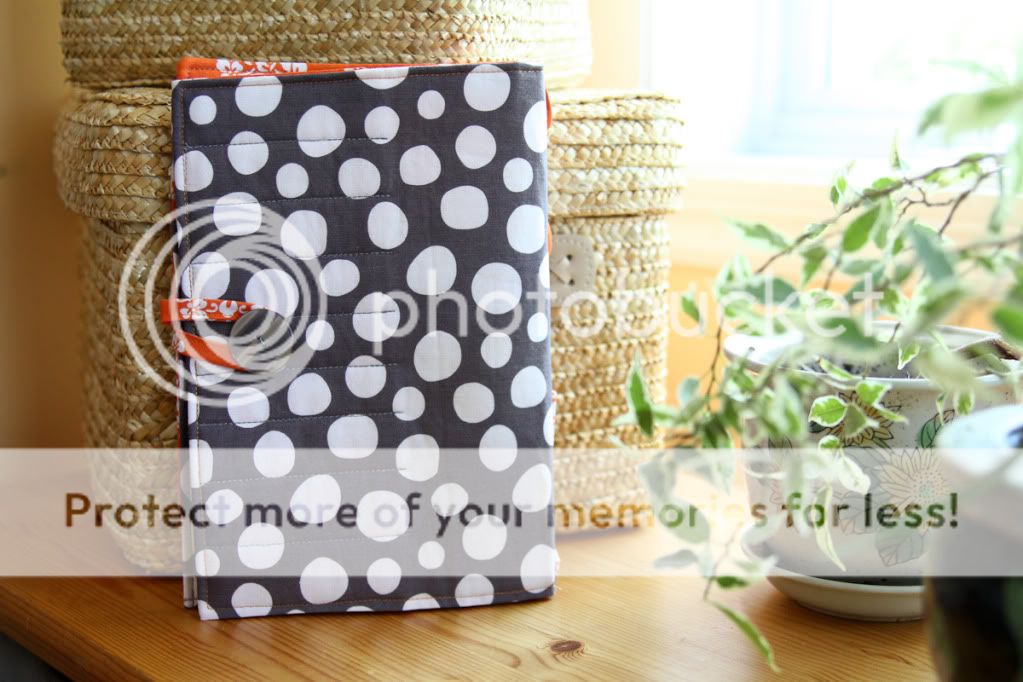
Today's pattern out of the book is the School Binder Cover. This took me (not including hand embroidery) about and hour and a half from making pattern pieces to finished. It's a great starter project for a beginner. No difficult piecing straight forward instructions.

The only thing I would do different is I would change the seam allowance.
  • Either add 1/4 inch ~ total seam allowance would be 3/4 of an inch.
  • Make seam allowance 1/2 but only stitch 1/4 inch seam
This way I would have had that extra 1/4 ease to topstitch the cover and give it a more finished look. Right now it's a perfect fit with no room to add it.

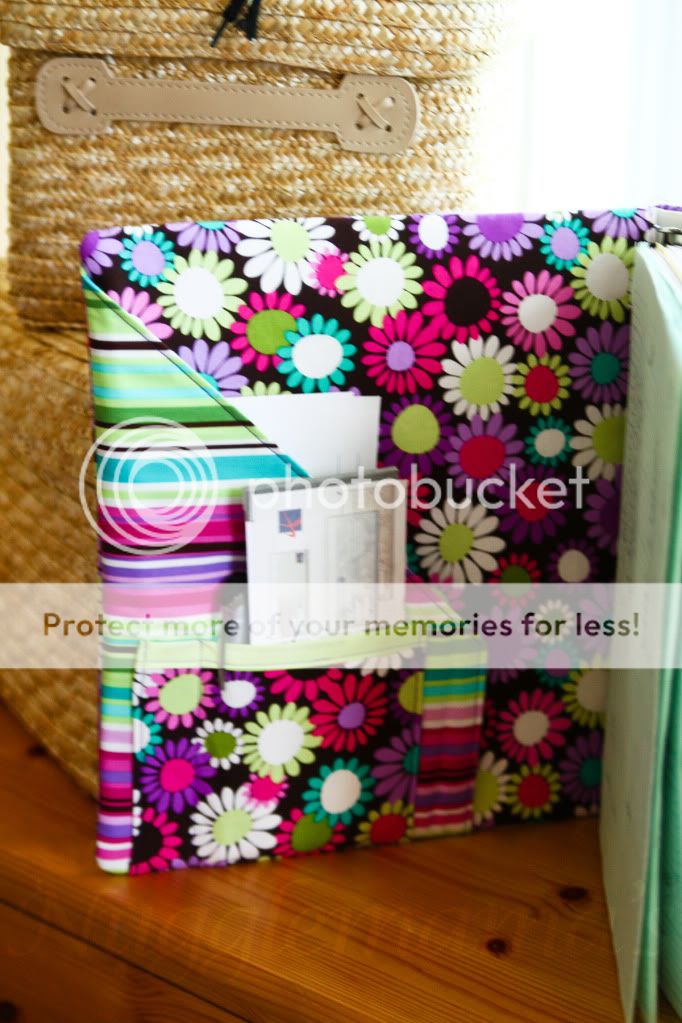
Here are the pictures of my finished project. I probably added 2 hours to the project because of the hand appliqueing the letters with a mix of embroidery stitches. I am not proficient at it and I have arthritis so it was slow going.


Wednesday, May 12, 2010

A funny sketch from Regretsy. I will add a disclaimer... The f word in mentioned once or twice but the graphic is funny enough to skip over that part.

Sewing machine parts

I need to get myself that on a mug or wall hanging or something. I love it! Stay tuned I hope to have a post for you tomorrow launching my year long weekly post about something I made out of the book One-Yard Wonders: 101 Sewing Projects. I am starting with a binder cover.